Create an email account
Before you start
Section titled “Before you start”- A domain added to your account (Add a domain covers that).
- Decide what local part you want — the bit before the
@. For example,janeto get[email protected]. - About 5 minutes.
Sign in to WHP
Section titled “Sign in to WHP”You can sign in to WHP two ways:
- Through your client portal (recommended). Go to https://secure.anhonesthost.com, sign in to your account, open Services → My Services, click your hosting plan, then click Login to WHP. No extra password to remember.
- Directly with your WHP credentials. Visit
https://<your-server-hostname>:8443and sign in with the WHP username and password you set up. Your server hostname is in your welcome email and on the service page in the client portal.
-
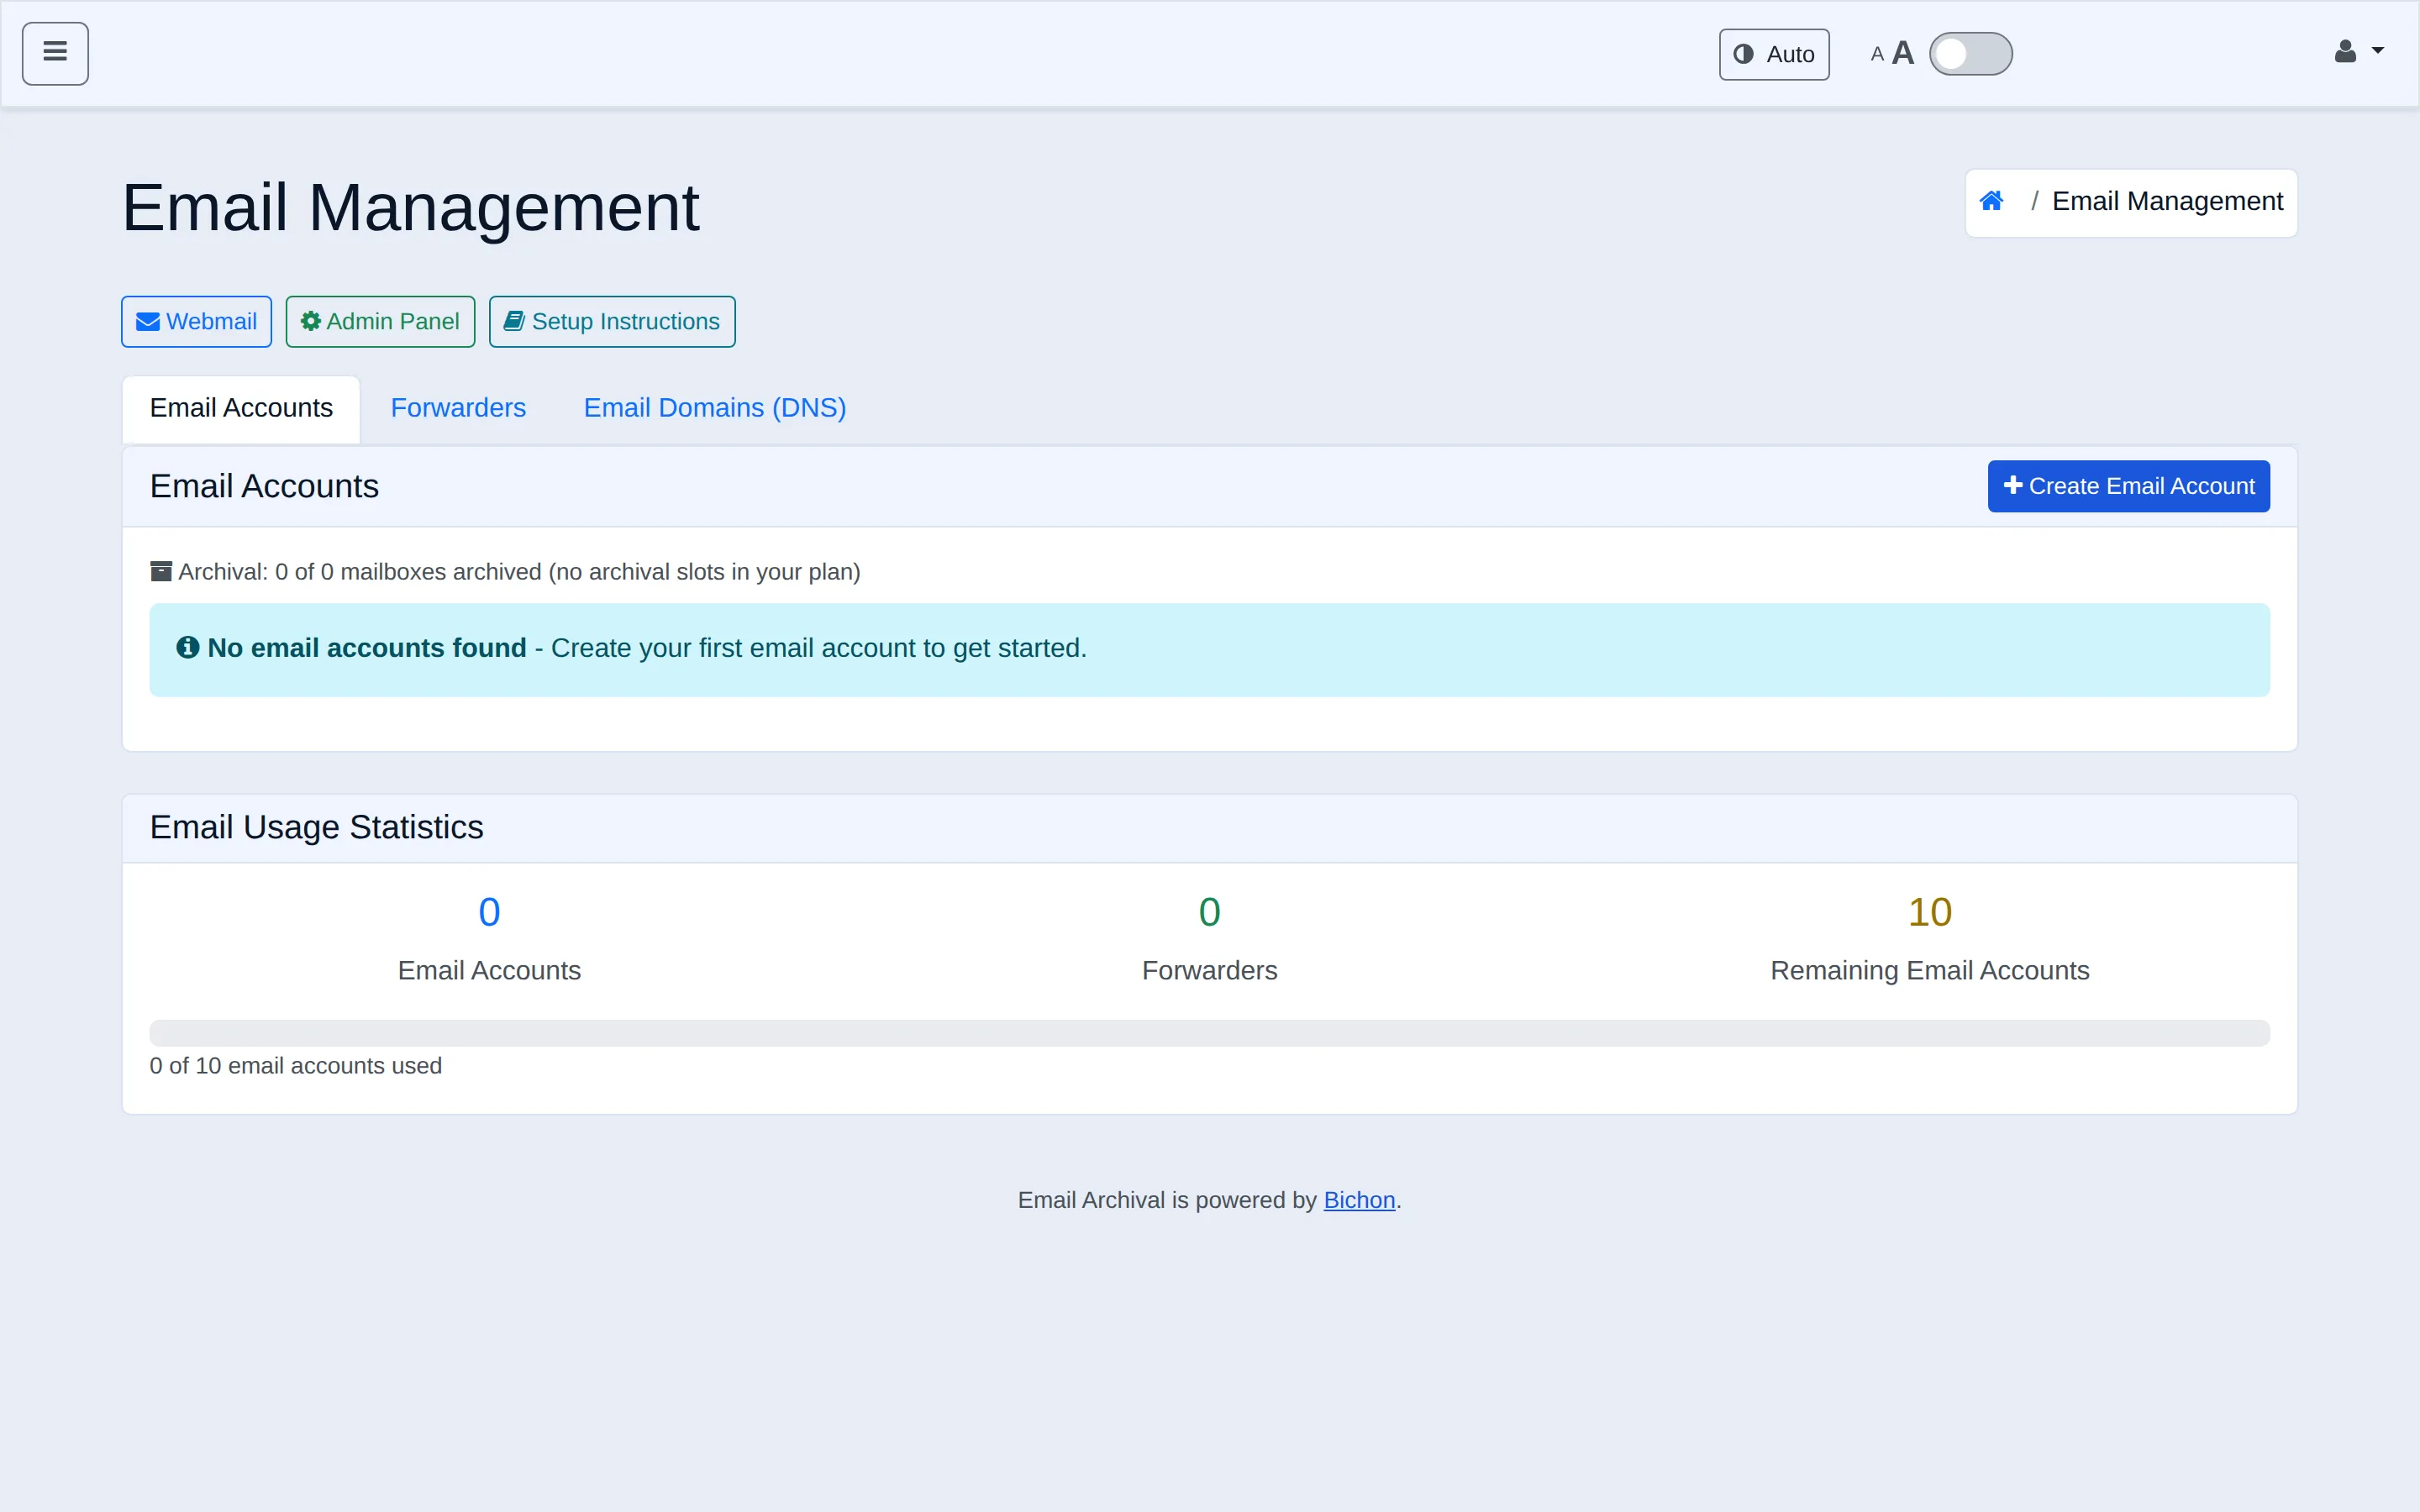
In the sidebar, click Email. The page is organized into tabs — Email Accounts, Forwarders, and Email Domains (DNS) — and opens on Email Accounts. The buttons along the top (Webmail, Admin Panel, Setup Instructions) open the mail server’s web tools in a new tab.
-
On the Email Accounts tab, click Create Email Account to open the new-account form. You’ll be asked for the domain, the local part, a password, and an optional mailbox size cap.
-
Set a strong password — at least 12 characters with a mix of upper case, lower case, numbers, and symbols. Email accounts are common attack targets.
-
Click Create Account. The new account appears in the Email Accounts list.
Auto-configure your mail app
Section titled “Auto-configure your mail app”Most modern mail apps — Outlook, Apple Mail, Thunderbird, and the iOS and Android mail apps — can set themselves up from your domain’s DNS. You enter your full email address and password, and the app finds the right servers, ports, and security settings on its own.
If your domain uses our nameservers, this already works — we add the necessary records automatically when you add the domain, so there’s nothing for you to do.
If your DNS is hosted elsewhere
Section titled “If your DNS is hosted elsewhere”If your domain’s DNS lives at another provider (Cloudflare, GoDaddy, Namecheap, and so on), your mail app can’t auto-configure until you add a few records there yourself. The Email page builds the exact records for you: open the Email Domains (DNS) tab, find Autodiscovery Records (DNS), pick the domain, and copy them in.
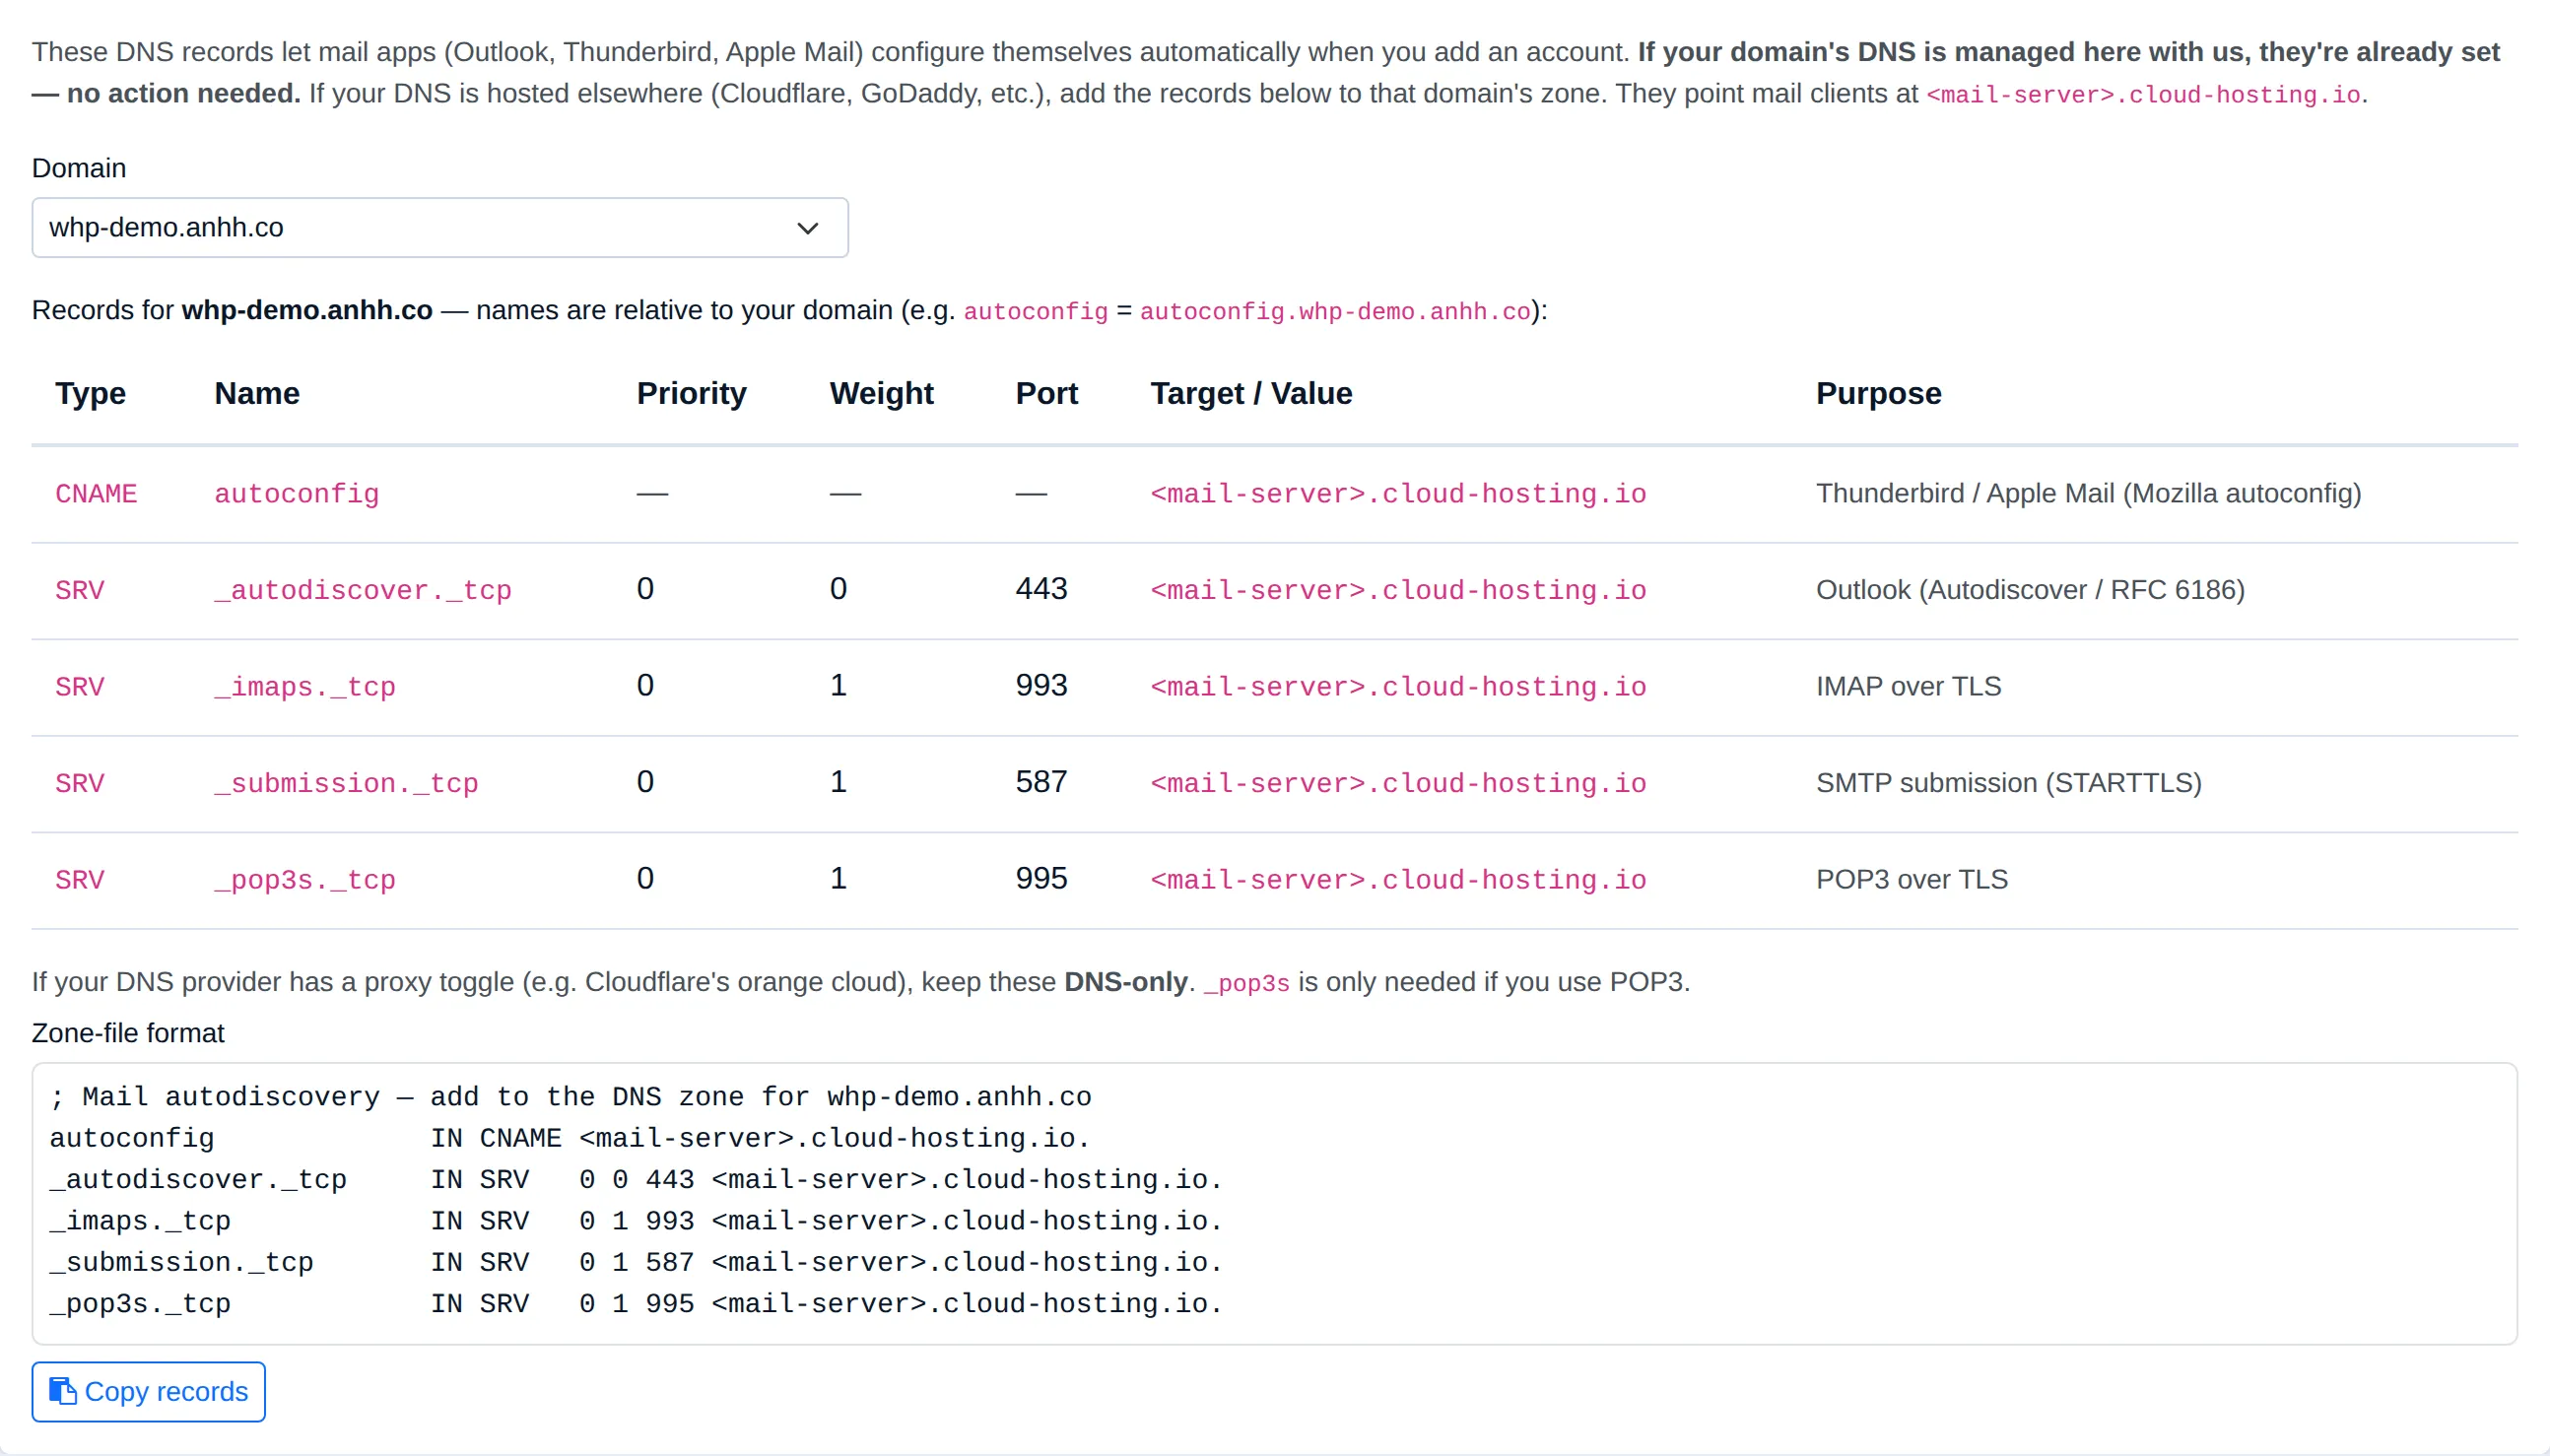
Add these records to the domain’s zone at your DNS provider. The names are relative to your domain — most providers fill in the rest automatically, so autoconfig becomes autoconfig.example.com.
| Type | Name | Priority | Weight | Port | Value |
|---|---|---|---|---|---|
| CNAME | autoconfig | — | — | — | your mail server |
| SRV | _autodiscover._tcp | 0 | 0 | 443 | your mail server |
| SRV | _imaps._tcp | 0 | 1 | 993 | your mail server |
| SRV | _submission._tcp | 0 | 1 | 587 | your mail server |
| SRV | _pop3s._tcp | 0 | 1 | 995 | your mail server |
Use the mail server hostname shown in the Autodiscovery Records (DNS) section as the value — it’s the same host your MX record points at. The _pop3s record is only needed if you read mail over POP3 instead of IMAP. Click Copy records to grab them all at once in zone-file format.
Set up your email client
Section titled “Set up your email client”Most apps configure themselves from the records above once you enter your address and password. If yours doesn’t support that — or you’d rather enter the settings by hand — the exact IMAP, POP3, and SMTP hostnames are listed on the Email page: click Setup Instructions at the top of the page for a step-by-step that includes the right hostnames, ports, and security settings for your server.
The typical settings look like this; substitute the hostname shown in the Setup Instructions:
IMAP (incoming)  Host:     <see Setup Instructions>  Port:     993  Security: SSL/TLS  Username: full email address (e.g., [email protected])  Password: the one you set above
SMTP (outgoing)  Host:     <see Setup Instructions>  Port:     465  Security: SSL/TLS  Username: full email address  Password: same as IMAP
For outgoing mail, port 465 with SSL/TLS is the standard. If your client prefers STARTTLS, port 587 is the alternate submission port. (Don’t use port 25 from a mail client — it’s for server-to-server delivery and most networks block it.)
For per-client walkthroughs (Outlook, Apple Mail, Thunderbird, etc.), see the Email clients section — coming soon.
Webmail
Section titled “Webmail”Click Webmail at the top of the Email page to sign in to webmail in a new tab.
Verify it worked
Section titled “Verify it worked”Send yourself a test message from another account (your personal Gmail, for example). It should arrive within a minute or two and be retrievable from both your client and webmail.
Troubleshooting
Section titled “Troubleshooting”Webmail isn’t reachable. Webmail is hosted at our address — the Webmail button on the Email page opens it directly — so it doesn’t depend on your domain or its DNS. If it doesn’t load, it’s almost always a temporary connection issue: try again in a few minutes or from another network, and open a support ticket if it persists.
Outgoing mail is bouncing or going to spam. Check the SPF and DKIM records. The DKIM Management section on the Email Domains (DNS) tab shows whether DKIM is configured for each of your domains.
Client can connect on IMAP but not SMTP. Some ISPs and corporate networks block outgoing mail ports. If sending fails on port 465, try the alternate submission port 587 (STARTTLS); if both fail, test from a different network to confirm it’s your network, and if so, your ISP is the place to ask.
Related
Section titled “Related”Still stuck?
Section titled “Still stuck?”Still stuck? Open a support ticket and our team will help.