Manage DNS records
When we host your DNS, WHP gives you a full records editor — add, edit, or remove A, CNAME, MX, TXT, and other records yourself, no support ticket needed.
Before you start
Section titled “Before you start”- A domain already added to your account. If you haven’t done that yet, add a domain first.
- We must be running DNS for the domain (its nameservers point at us). If your DNS lives at another provider, make these changes there instead.
- A couple of minutes. Record changes apply quickly on our side, but can take up to 24 hours to propagate worldwide.
Sign in to WHP
Section titled “Sign in to WHP”You can sign in to WHP two ways:
- Through your client portal (recommended). Go to https://secure.anhonesthost.com, sign in to your account, open Services → My Services, click your hosting plan, then click Login to WHP. No extra password to remember.
- Directly with your WHP credentials. Visit
https://<your-server-hostname>:8443and sign in with the WHP username and password you set up. Your server hostname is in your welcome email and on the service page in the client portal.
Open the records editor
Section titled “Open the records editor”-
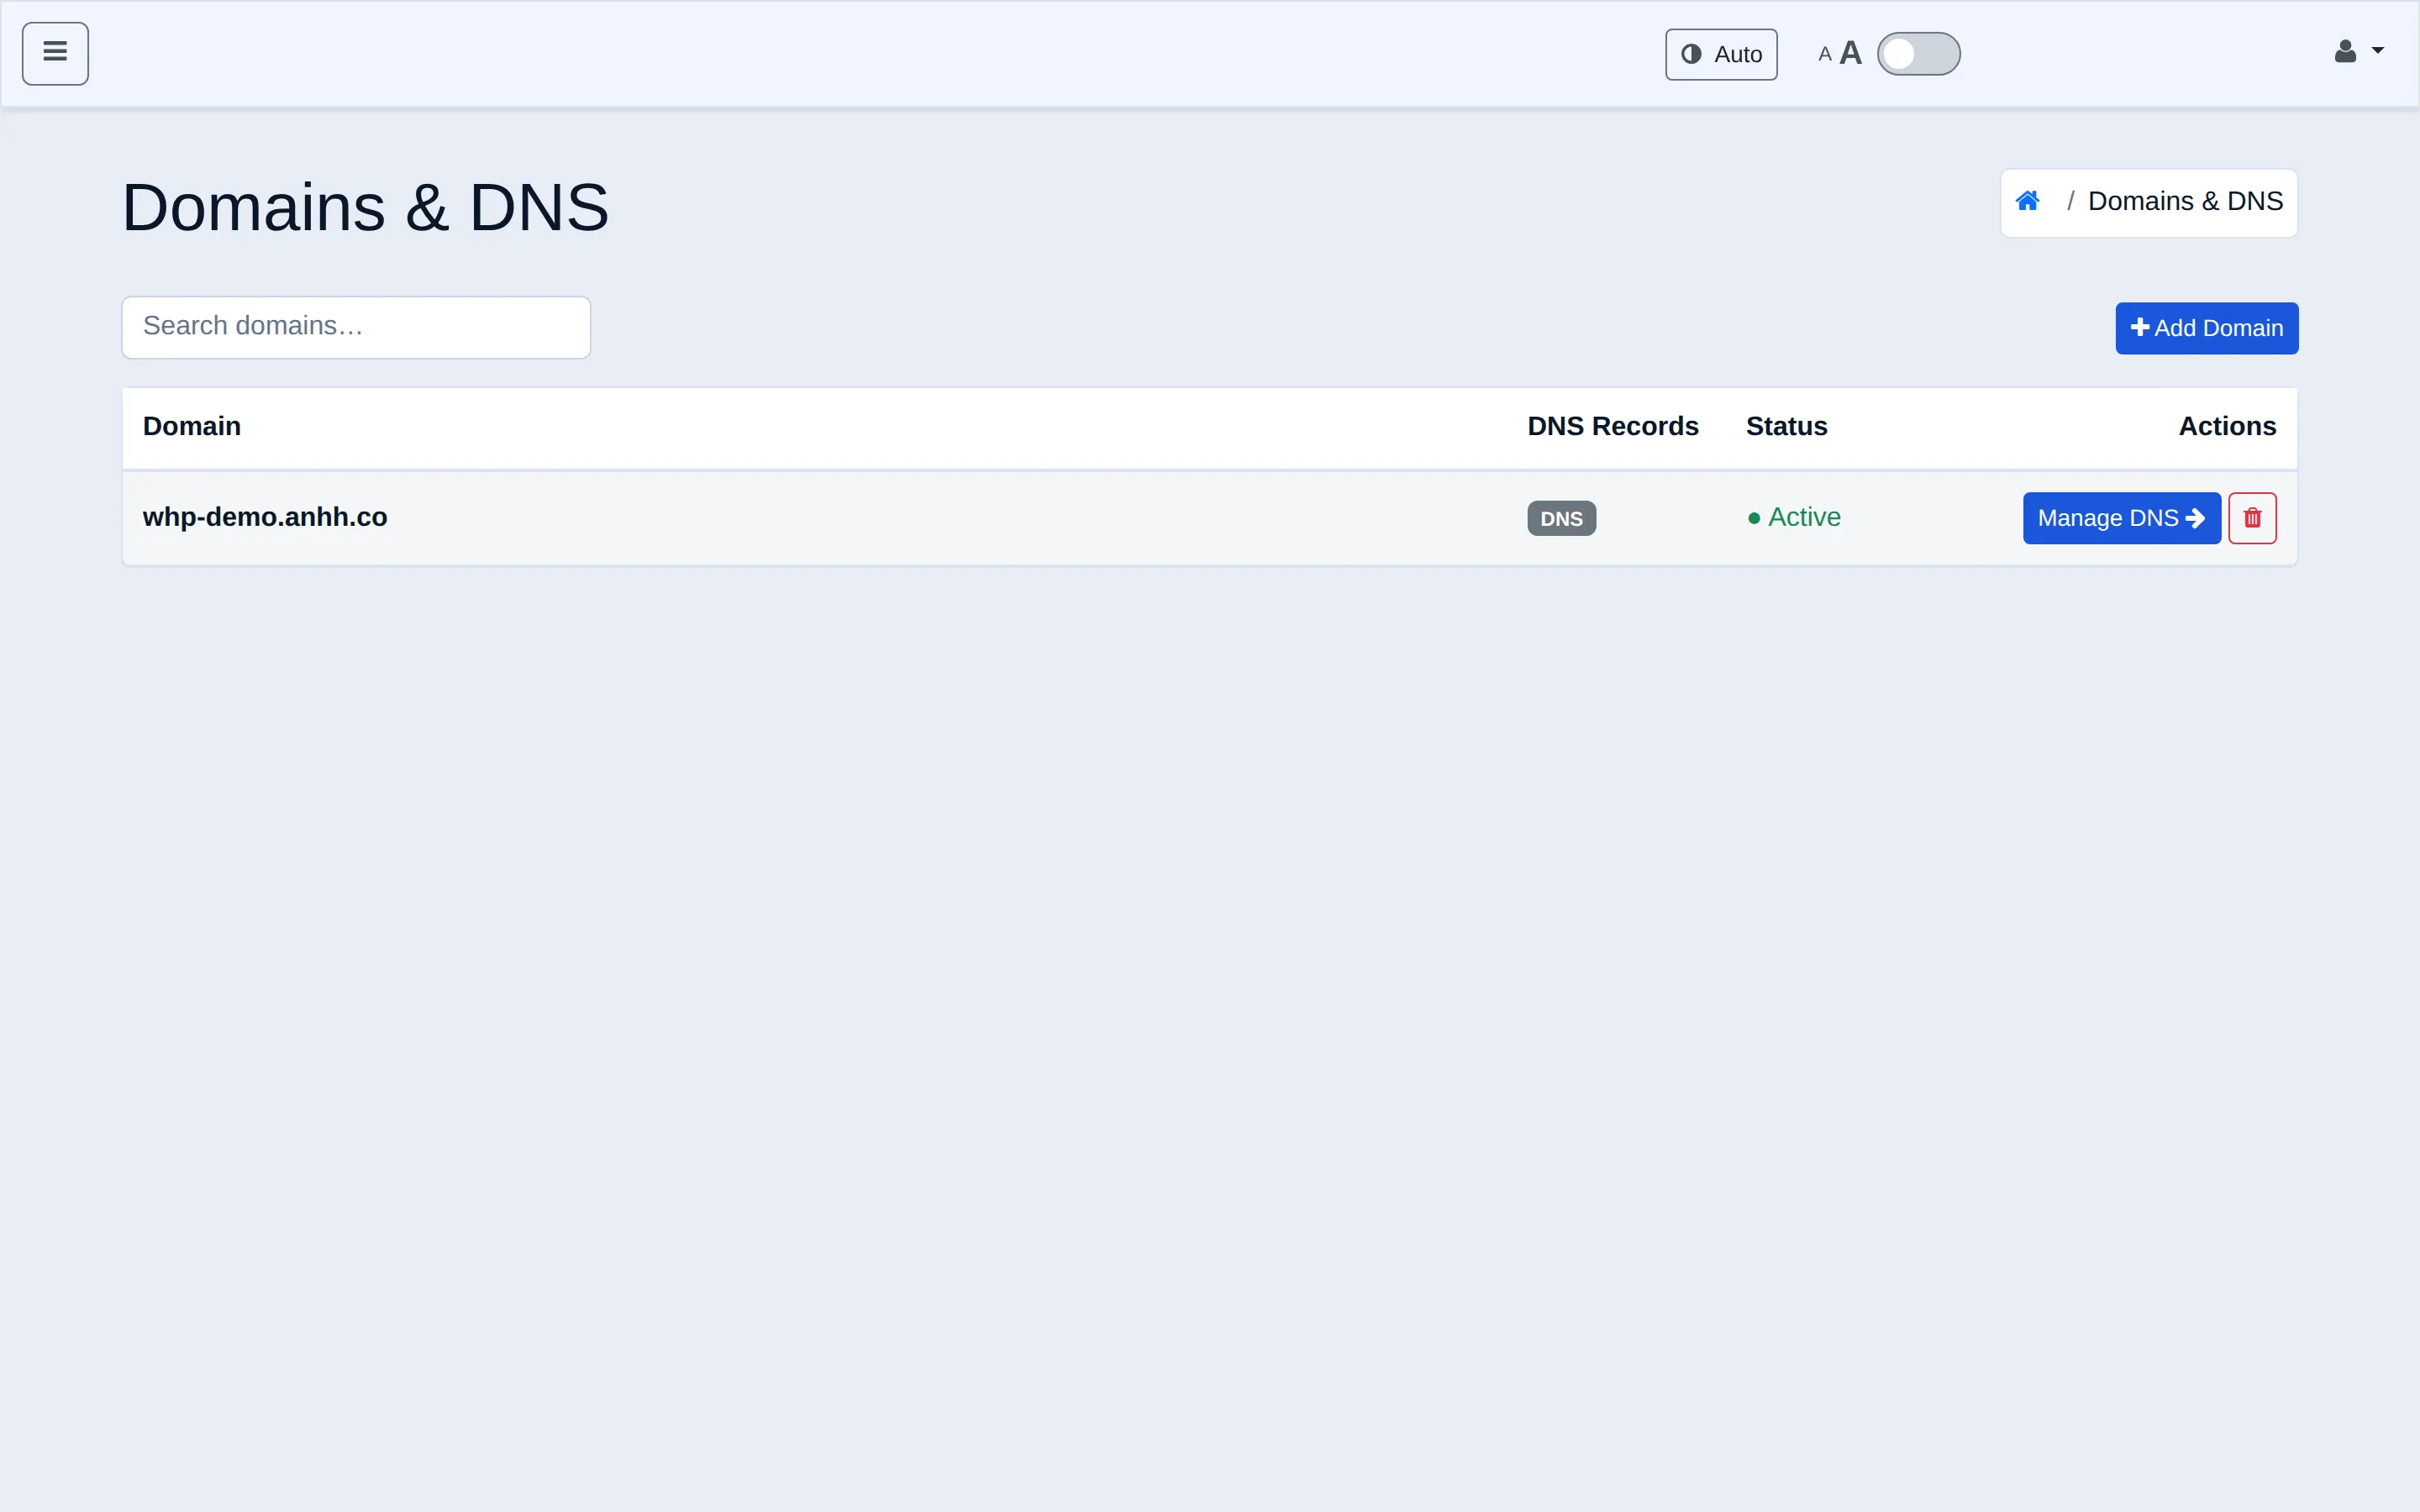
In the sidebar, click Domains & DNS.
-
Find your domain in the list and click Manage DNS.
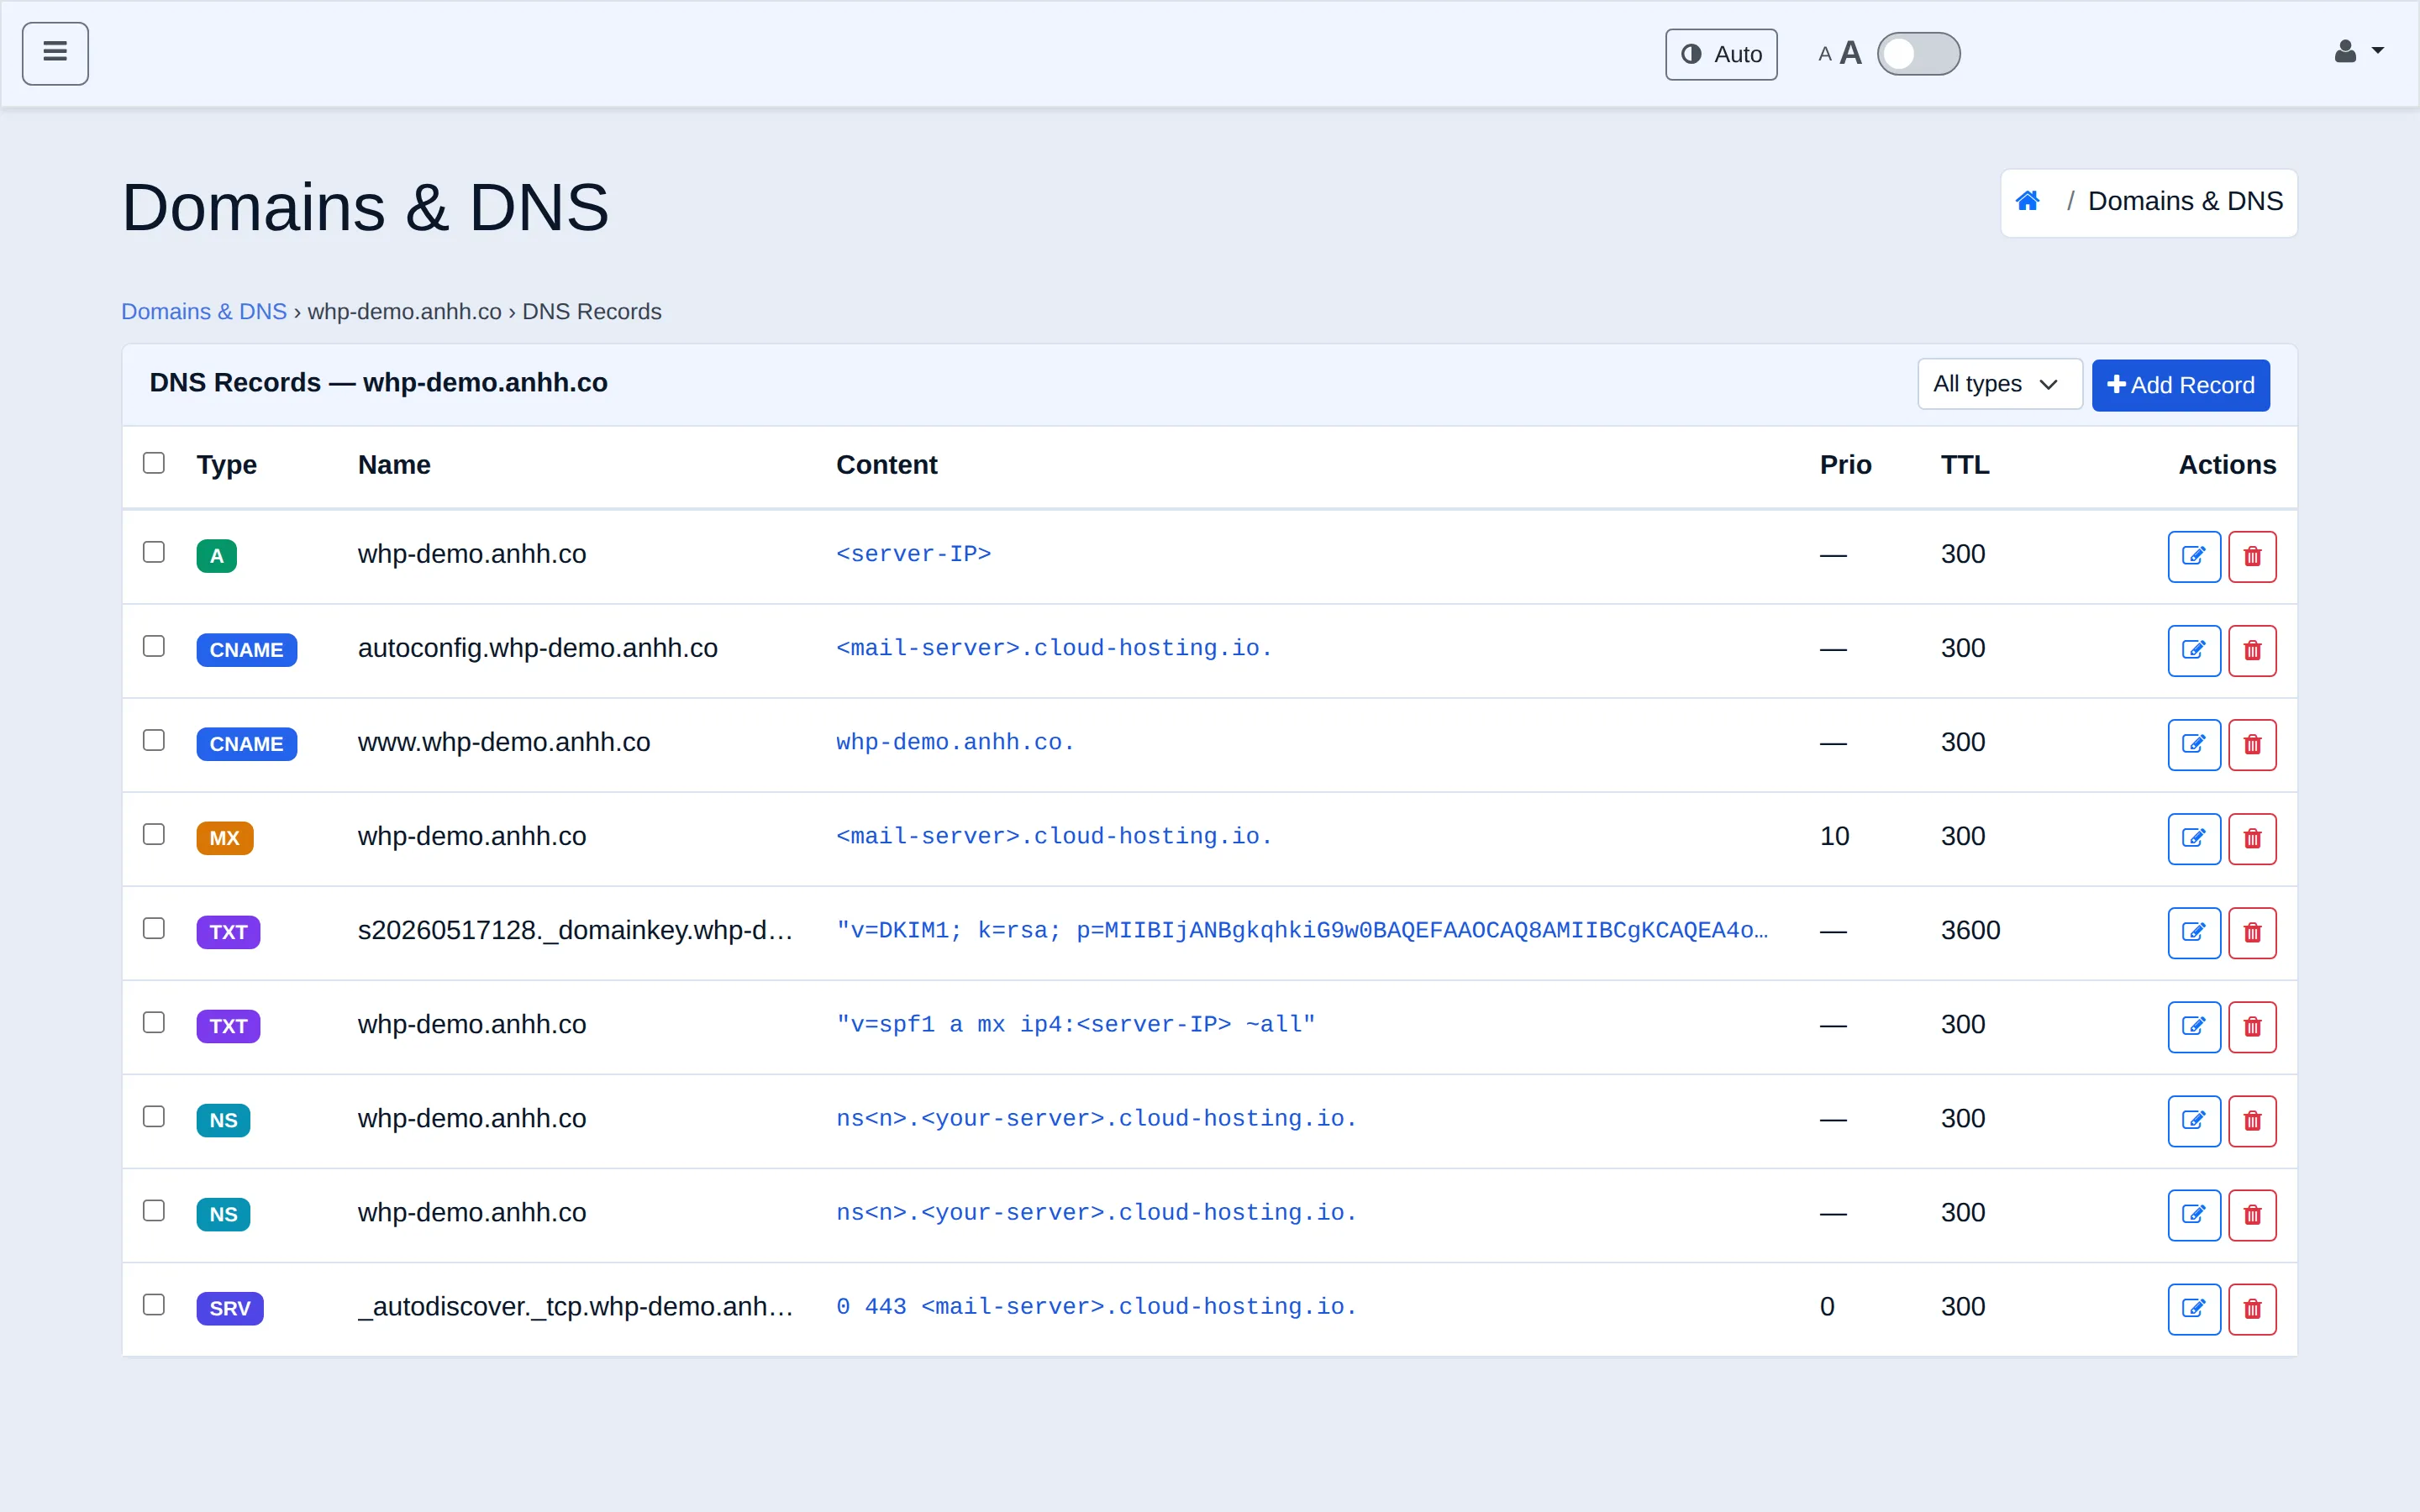
Each domain starts with a standard zone created automatically when the domain was added:
| Type | What it’s for |
|---|---|
| A | Points the apex domain at your server’s IP. |
| CNAME | Aliases like www and autoconfig to the right host. |
| MX | Routes mail for the domain to our mail server. |
| TXT | SPF and DKIM records that help your mail pass authentication. |
| NS | The nameservers that are authoritative for the domain. |
| SRV | Service records such as mail autodiscovery. |
Mail autodiscovery records
Section titled “Mail autodiscovery records”When we host your DNS, the records that let mail apps configure themselves — an autoconfig CNAME plus a set of _autodiscover / _imaps / _submission / _pop3s SRV records — are already in your zone. You don’t need to add them.
If your DNS is at another provider, add them there by hand. WHP builds the exact records for each domain on the Email page — see Auto-configure your mail app.
Add a record
Section titled “Add a record”-
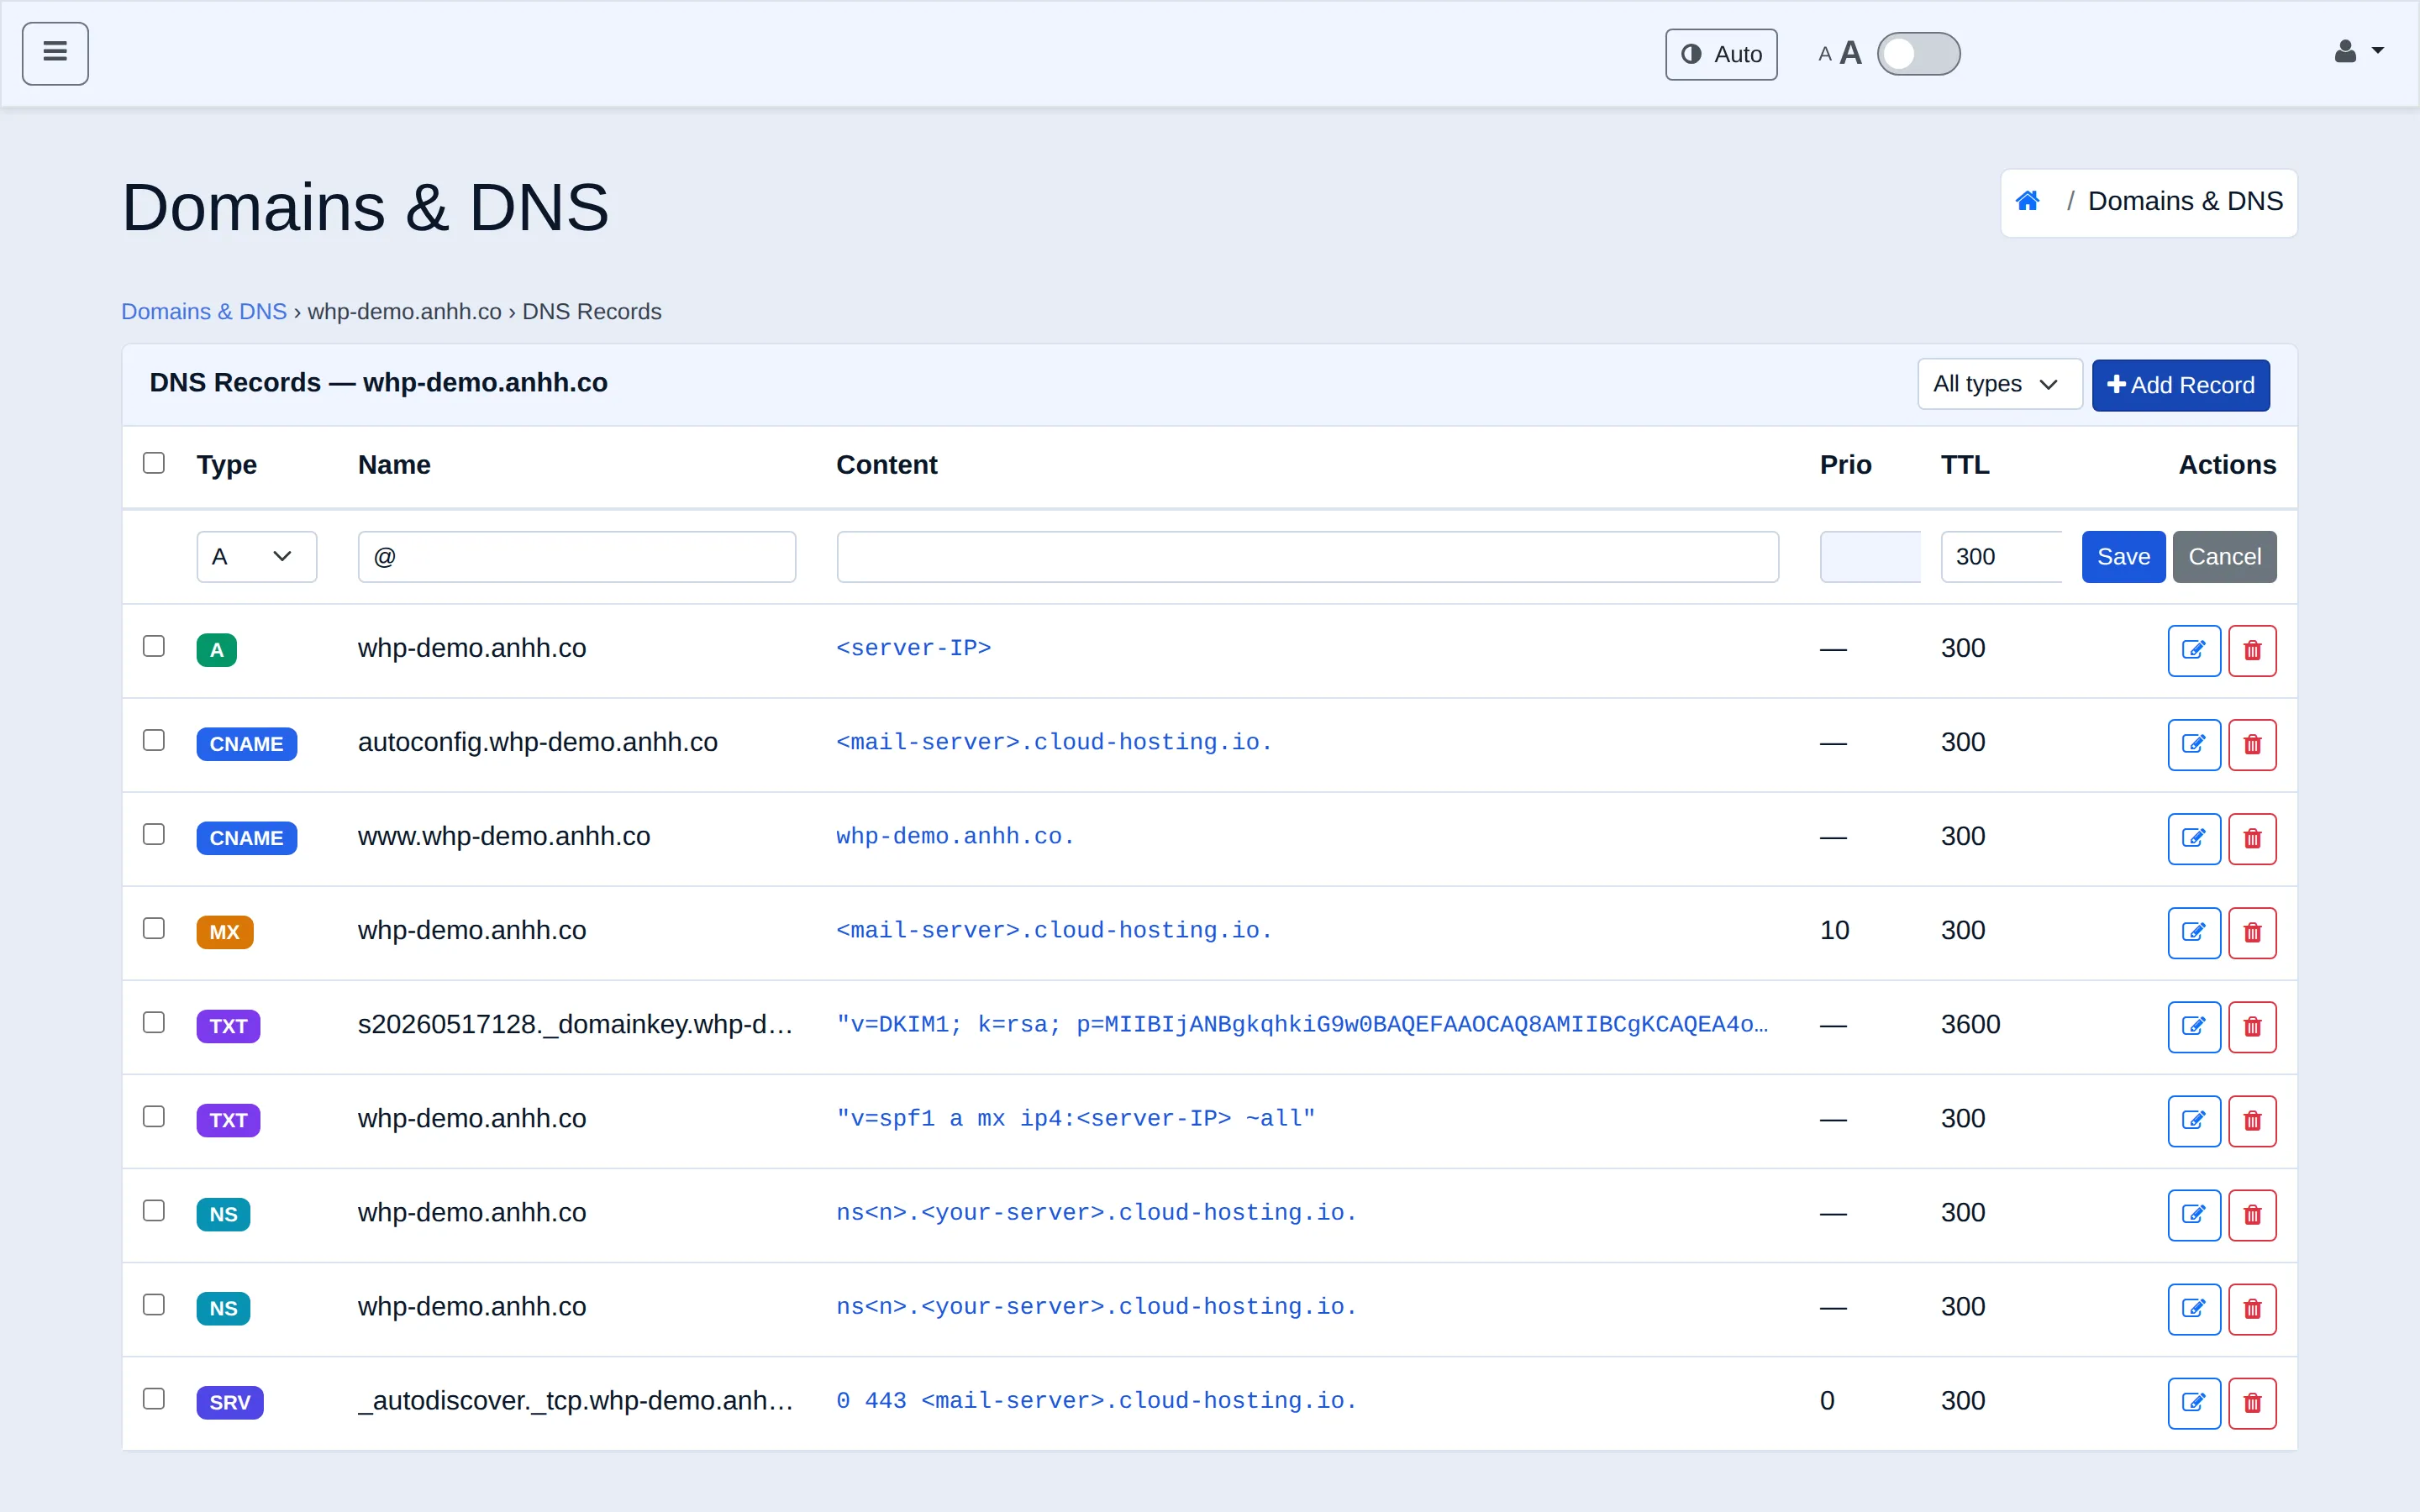
Click Add Record. A new, editable row appears at the top of the table.
-
Fill in the row:
- Type — choose the record type (A, AAAA, CNAME, MX, TXT, NS, PTR, SRV, CAA, SSHFP, or TLSA).
- Name — the host the record applies to. Use
@for the domain itself, or a subdomain likeblogforblog.example.com. - Content — the value: an IP for an A record, a hostname for a CNAME, and so on.
- Prio — only used by record types that need a priority (like MX). Leave it blank otherwise.
- TTL — how long resolvers may cache the record, in seconds. The default of
300(5 minutes) is fine for most records.
-
Click Save. The record joins the list immediately. (Click Cancel to discard the row without saving.)
Edit or delete a record
Section titled “Edit or delete a record”In the Actions column on the right of each row:
- The pencil icon opens the record for editing in place. Change any field, then save.
- The trash icon deletes the record. Deletions take effect right away, so double-check before you remove anything.
Find a record quickly
Section titled “Find a record quickly”If a domain has a lot of records, use the All types dropdown above the table to filter by a single record type — for example, show only MX records while you sort out mail.
Work with several records at once
Section titled “Work with several records at once”Tick the checkboxes on the left of one or more rows to reveal the bulk-action bar:
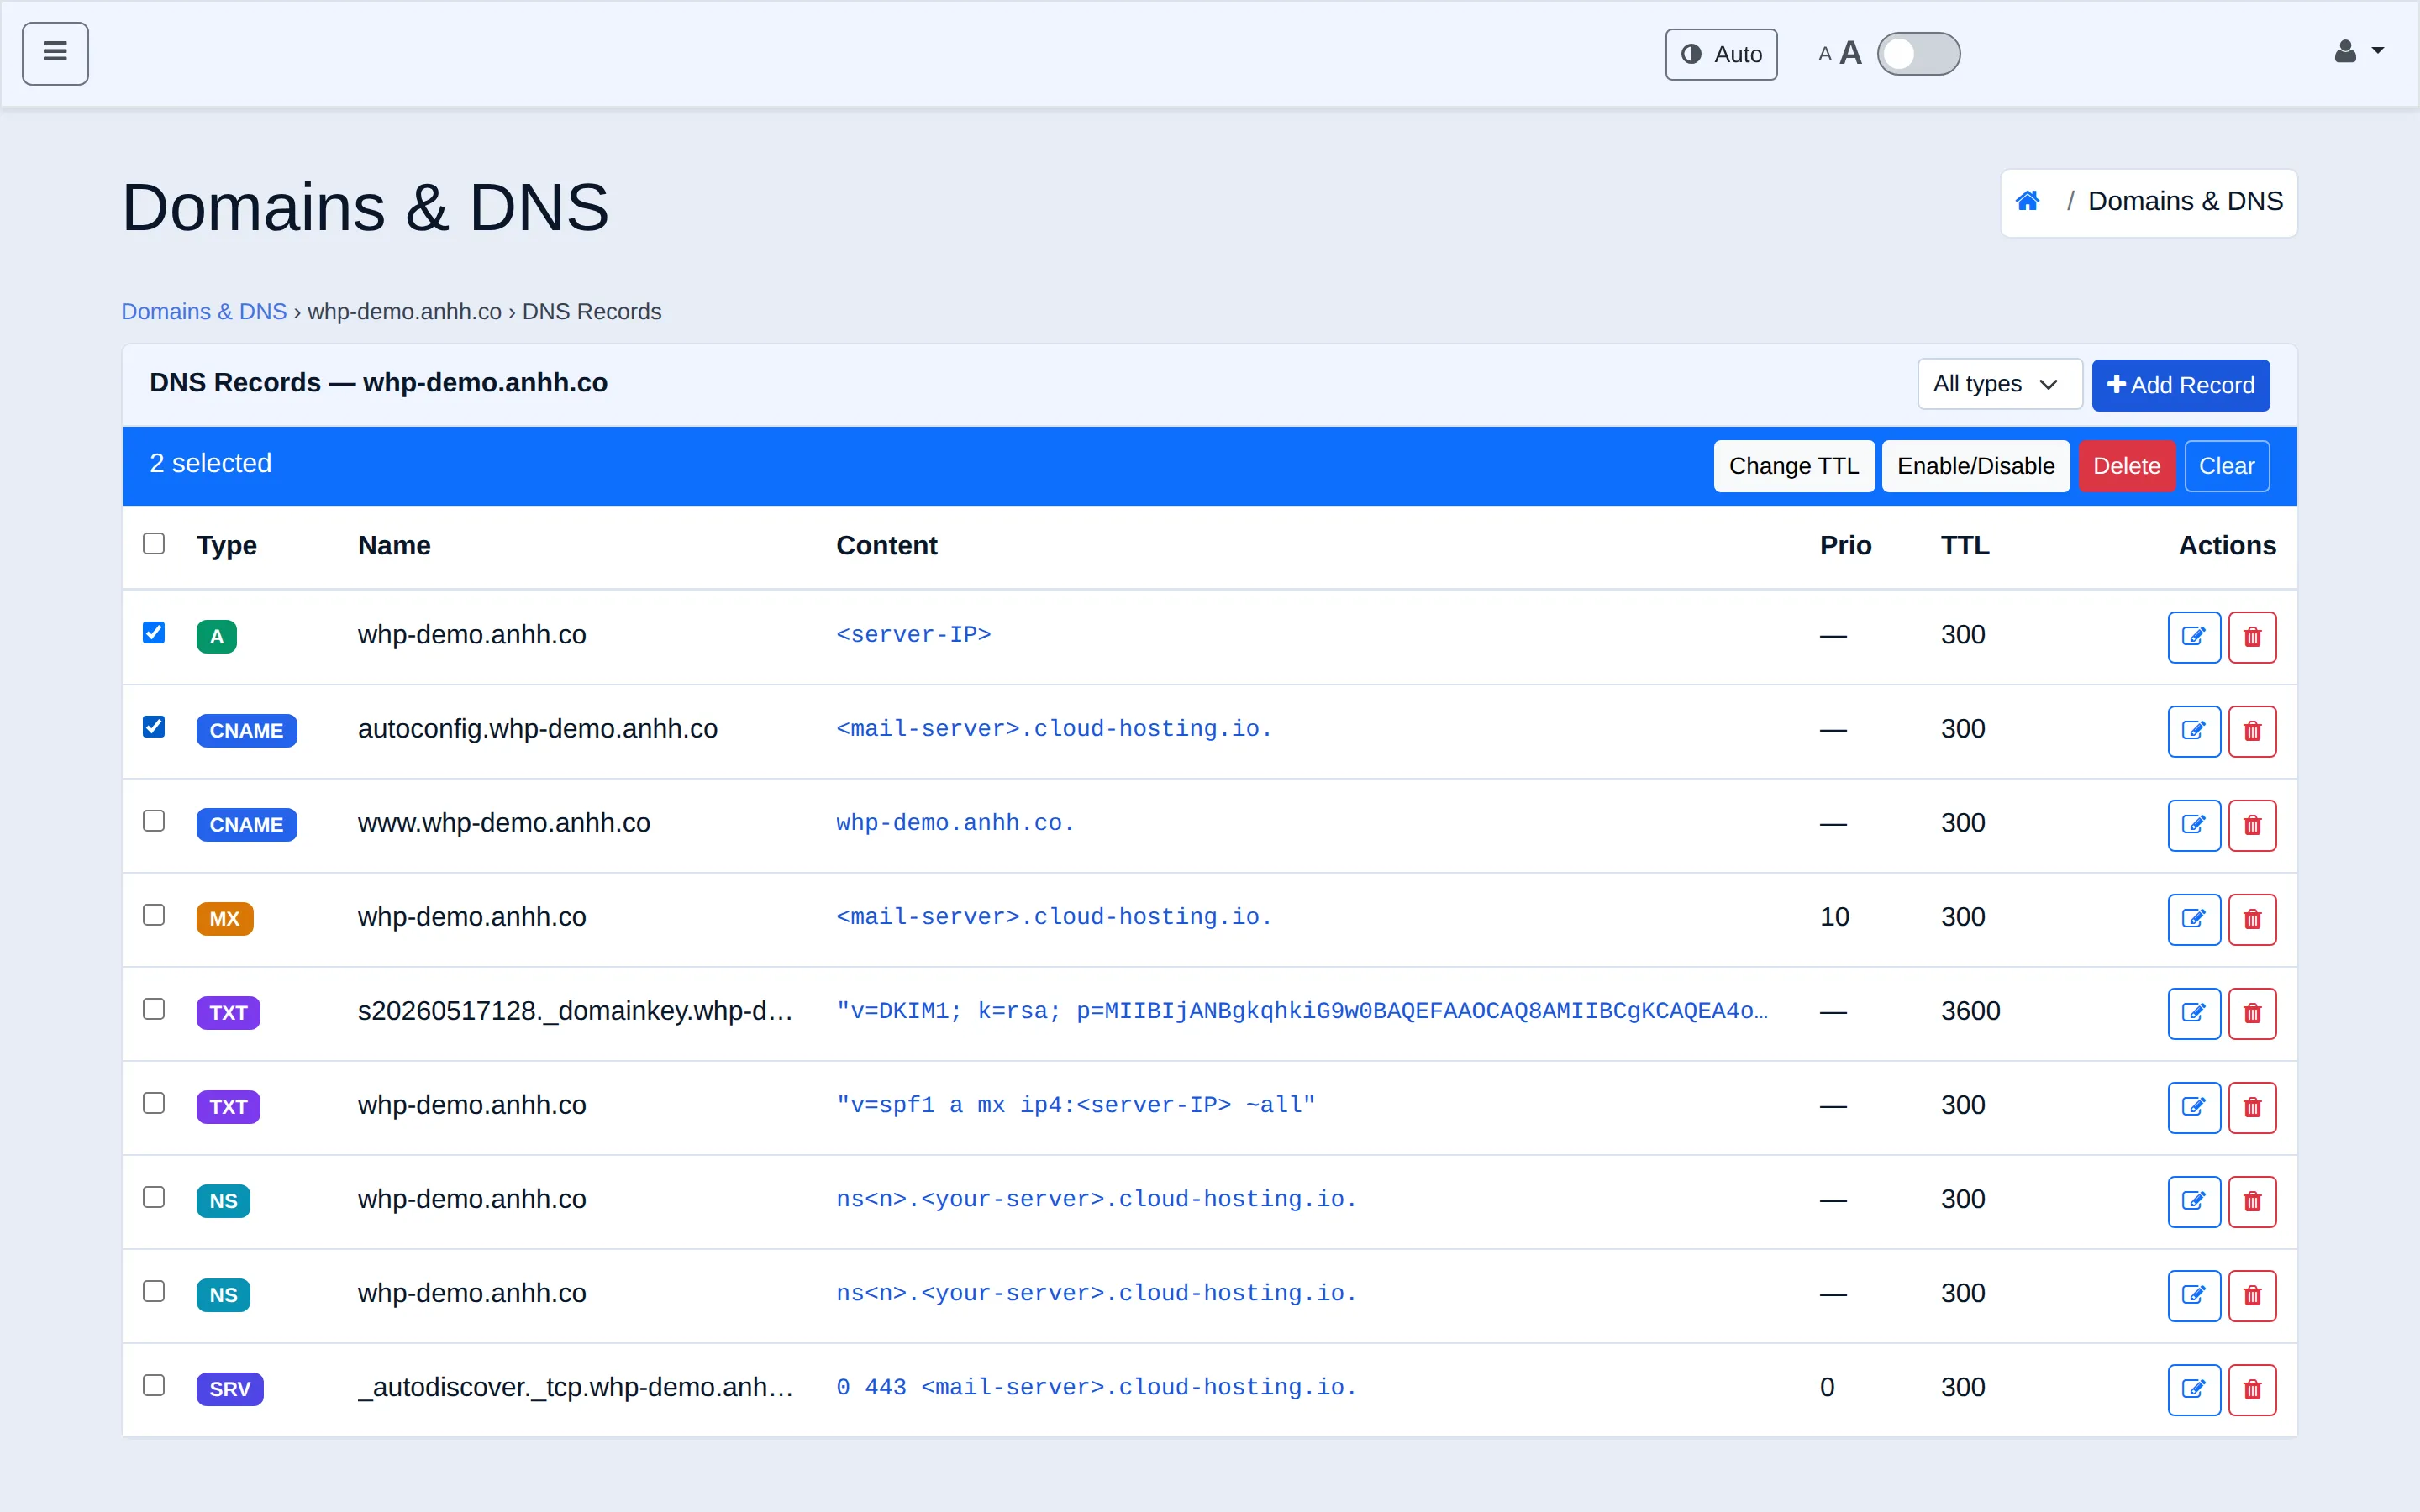
- Change TTL — set the same TTL on every selected record.
- Enable/Disable — toggle records on or off without deleting them (handy for temporarily parking a record).
- Delete — remove all selected records at once.
- Clear — clear your selection (this does not delete anything).
Verify it worked
Section titled “Verify it worked”DNS changes apply on our side within moments, but resolvers elsewhere may keep serving the old answer until the record’s TTL expires (up to 24 hours for unfamiliar records).
- Run
dig example.com +short(ordig blog.example.com A +short) from a terminal and confirm you see the value you just set. - Or use a web tool like whatsmydns.net to watch propagation across regions.
Troubleshooting
Section titled “Troubleshooting”My change isn’t showing up yet. Resolvers cache records for the length of their TTL. Wait for the TTL to pass, then clear your local DNS cache and check again with dig.
There’s no Manage DNS button for my domain. We’re not running DNS for it — its nameservers point somewhere else. Make the change at your current DNS provider, or point the domain’s nameservers at us first.
Email stopped working after I edited records. Restore the original MX and SPF/DKIM TXT records. If you’re not sure what they should be, open a support ticket (see below) and we’ll put them back.
Related
Section titled “Related”Still stuck?
Section titled “Still stuck?”Still stuck? Open a support ticket and our team will help.