Getting started
Beta feature. Site Builder is in active development. Some controls are still being refined and templates are being expanded. We’d love your feedback — use the Submit feedback link in the Site Builder header.
Before you start
Section titled “Before you start”- A site added in WHP that you want Site Builder to manage. Any container type works — Site Builder writes its output to the site’s docroot when you publish, so a Static HTML site is the cleanest fit.
- About 10–15 minutes for your first walkthrough.
Sign in to WHP
Section titled “Sign in to WHP”You can sign in to WHP two ways:
- Through your client portal (recommended). Go to https://secure.anhonesthost.com, sign in to your account, open Services → My Services, click your hosting plan, then click Login to WHP. No extra password to remember.
- Directly with your WHP credentials. Visit
https://<your-server-hostname>:8443and sign in with the WHP username and password you set up. Your server hostname is in your welcome email and on the service page in the client portal.
Open Site Builder
Section titled “Open Site Builder”-
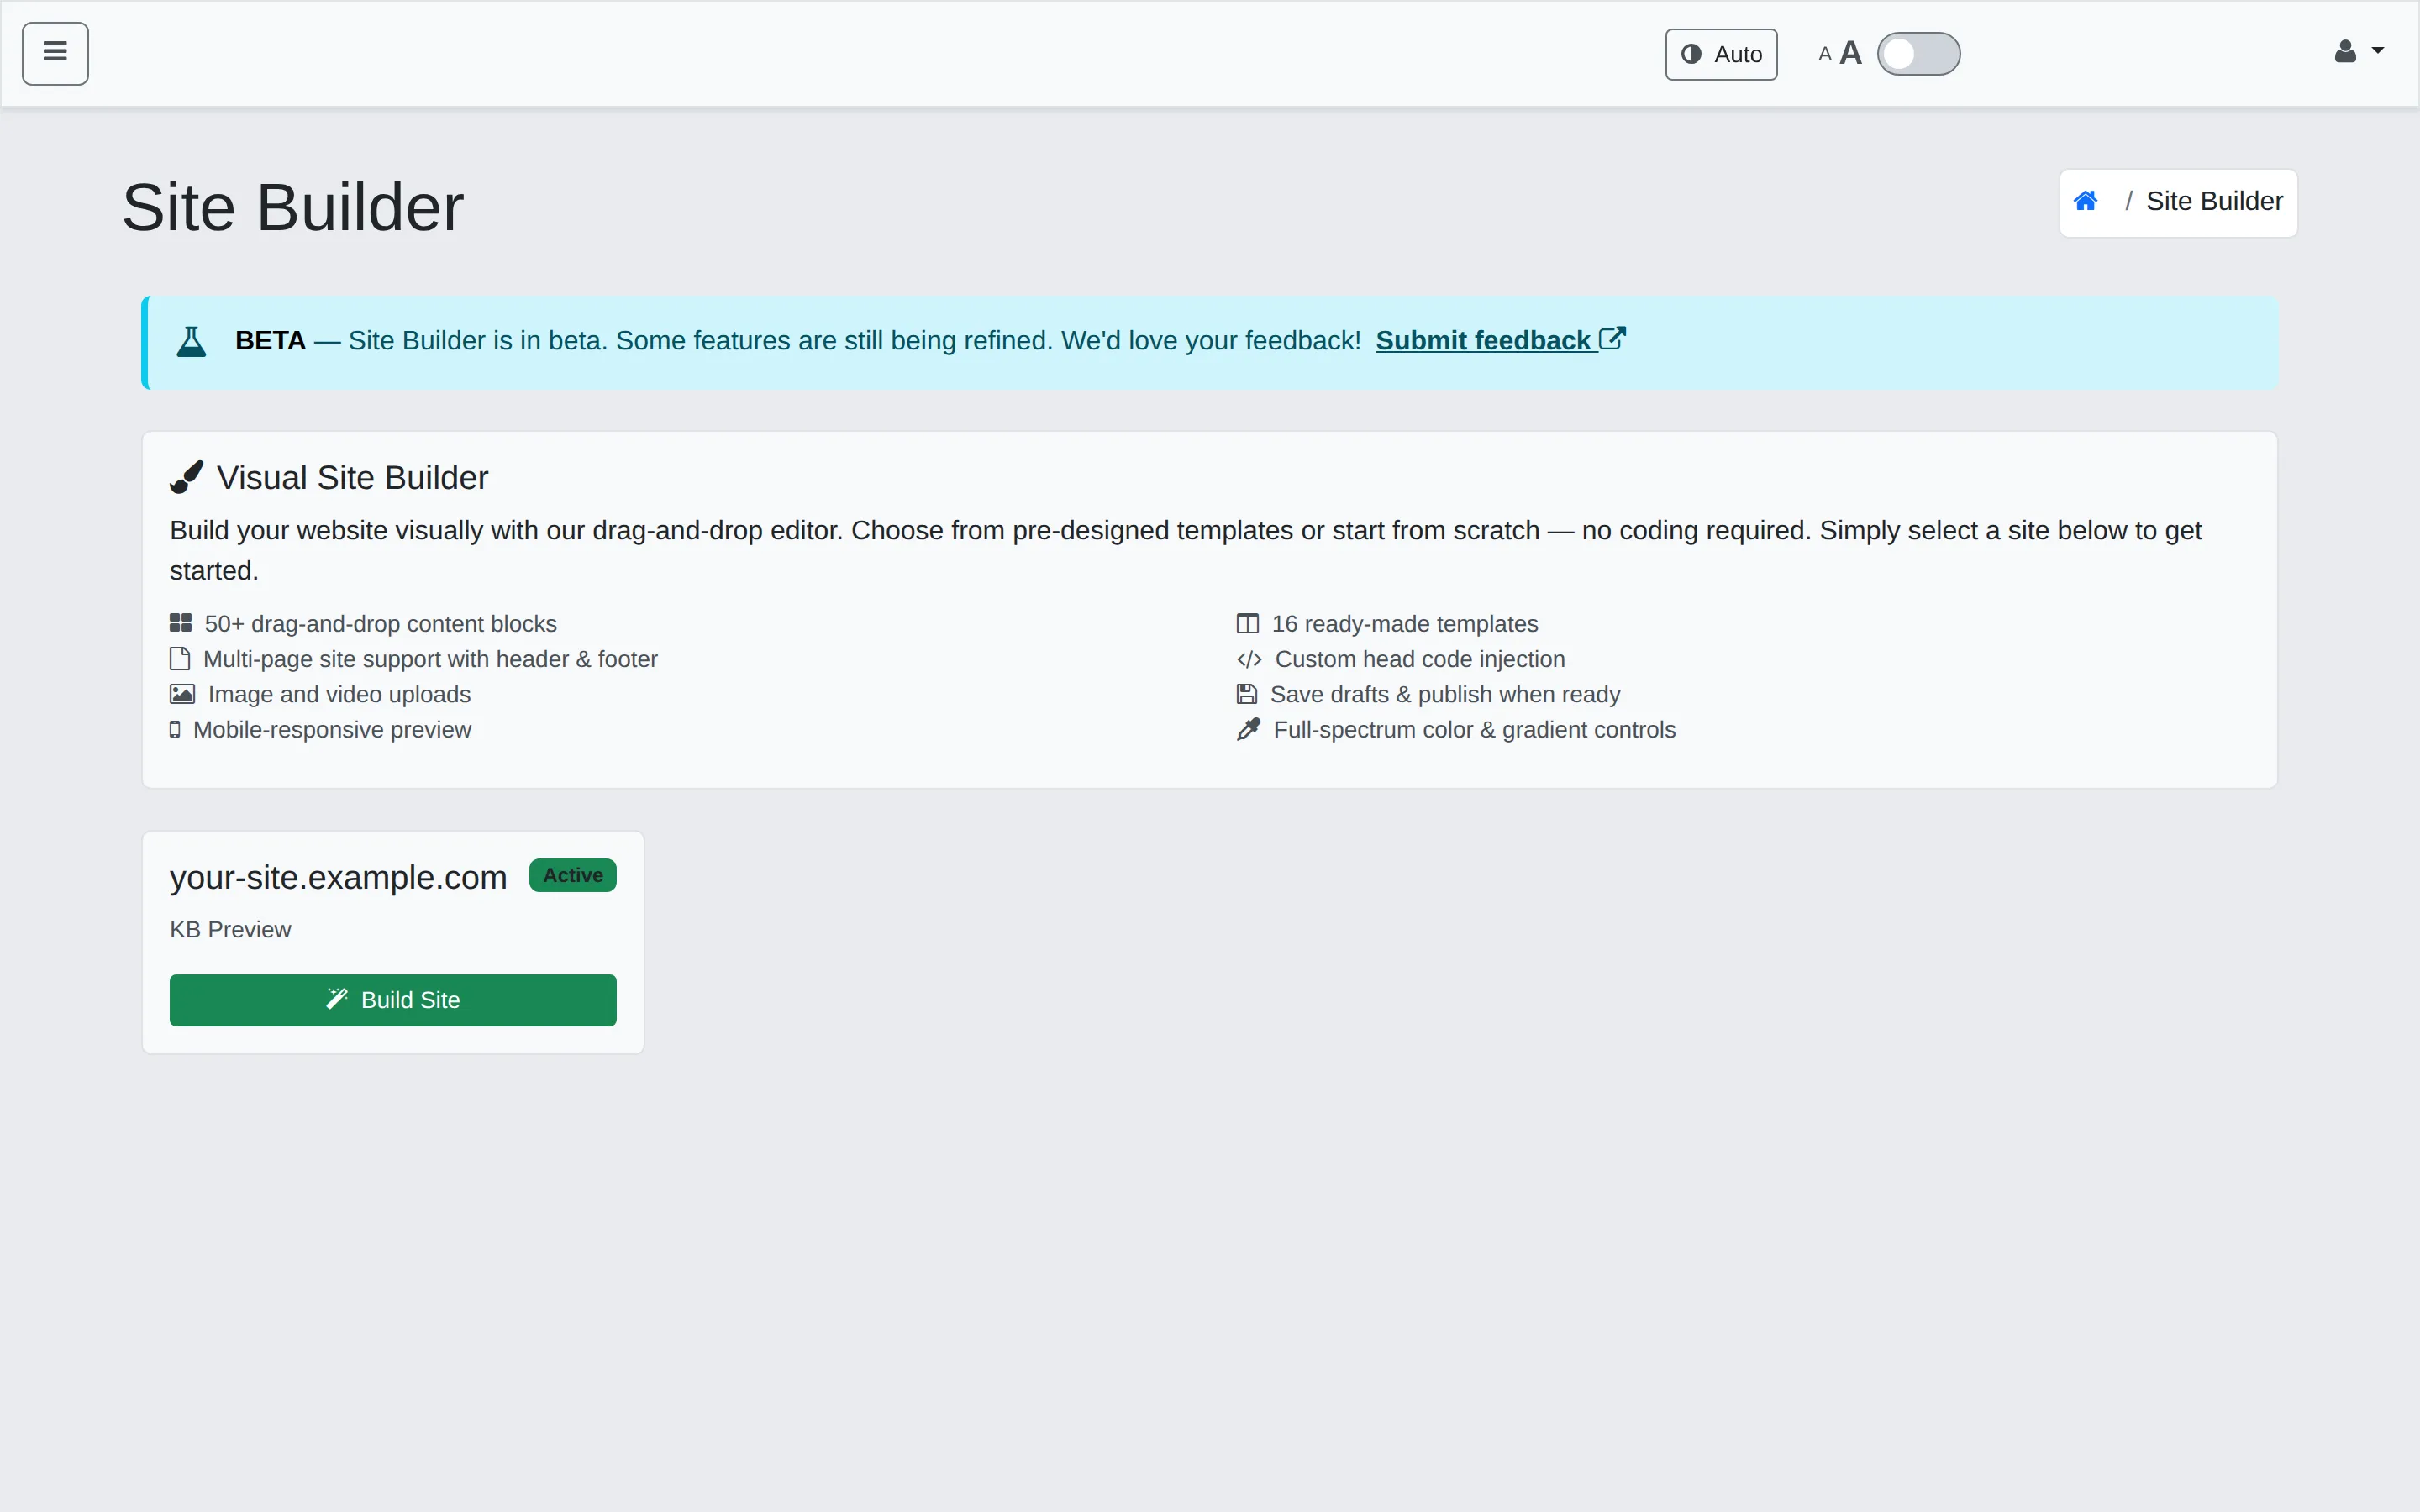
In the sidebar, click Site Builder. You’ll see a card for each site on your account.
-
Click Build Site on the site you want to edit. The visual editor opens.
Pick a template (or start blank)
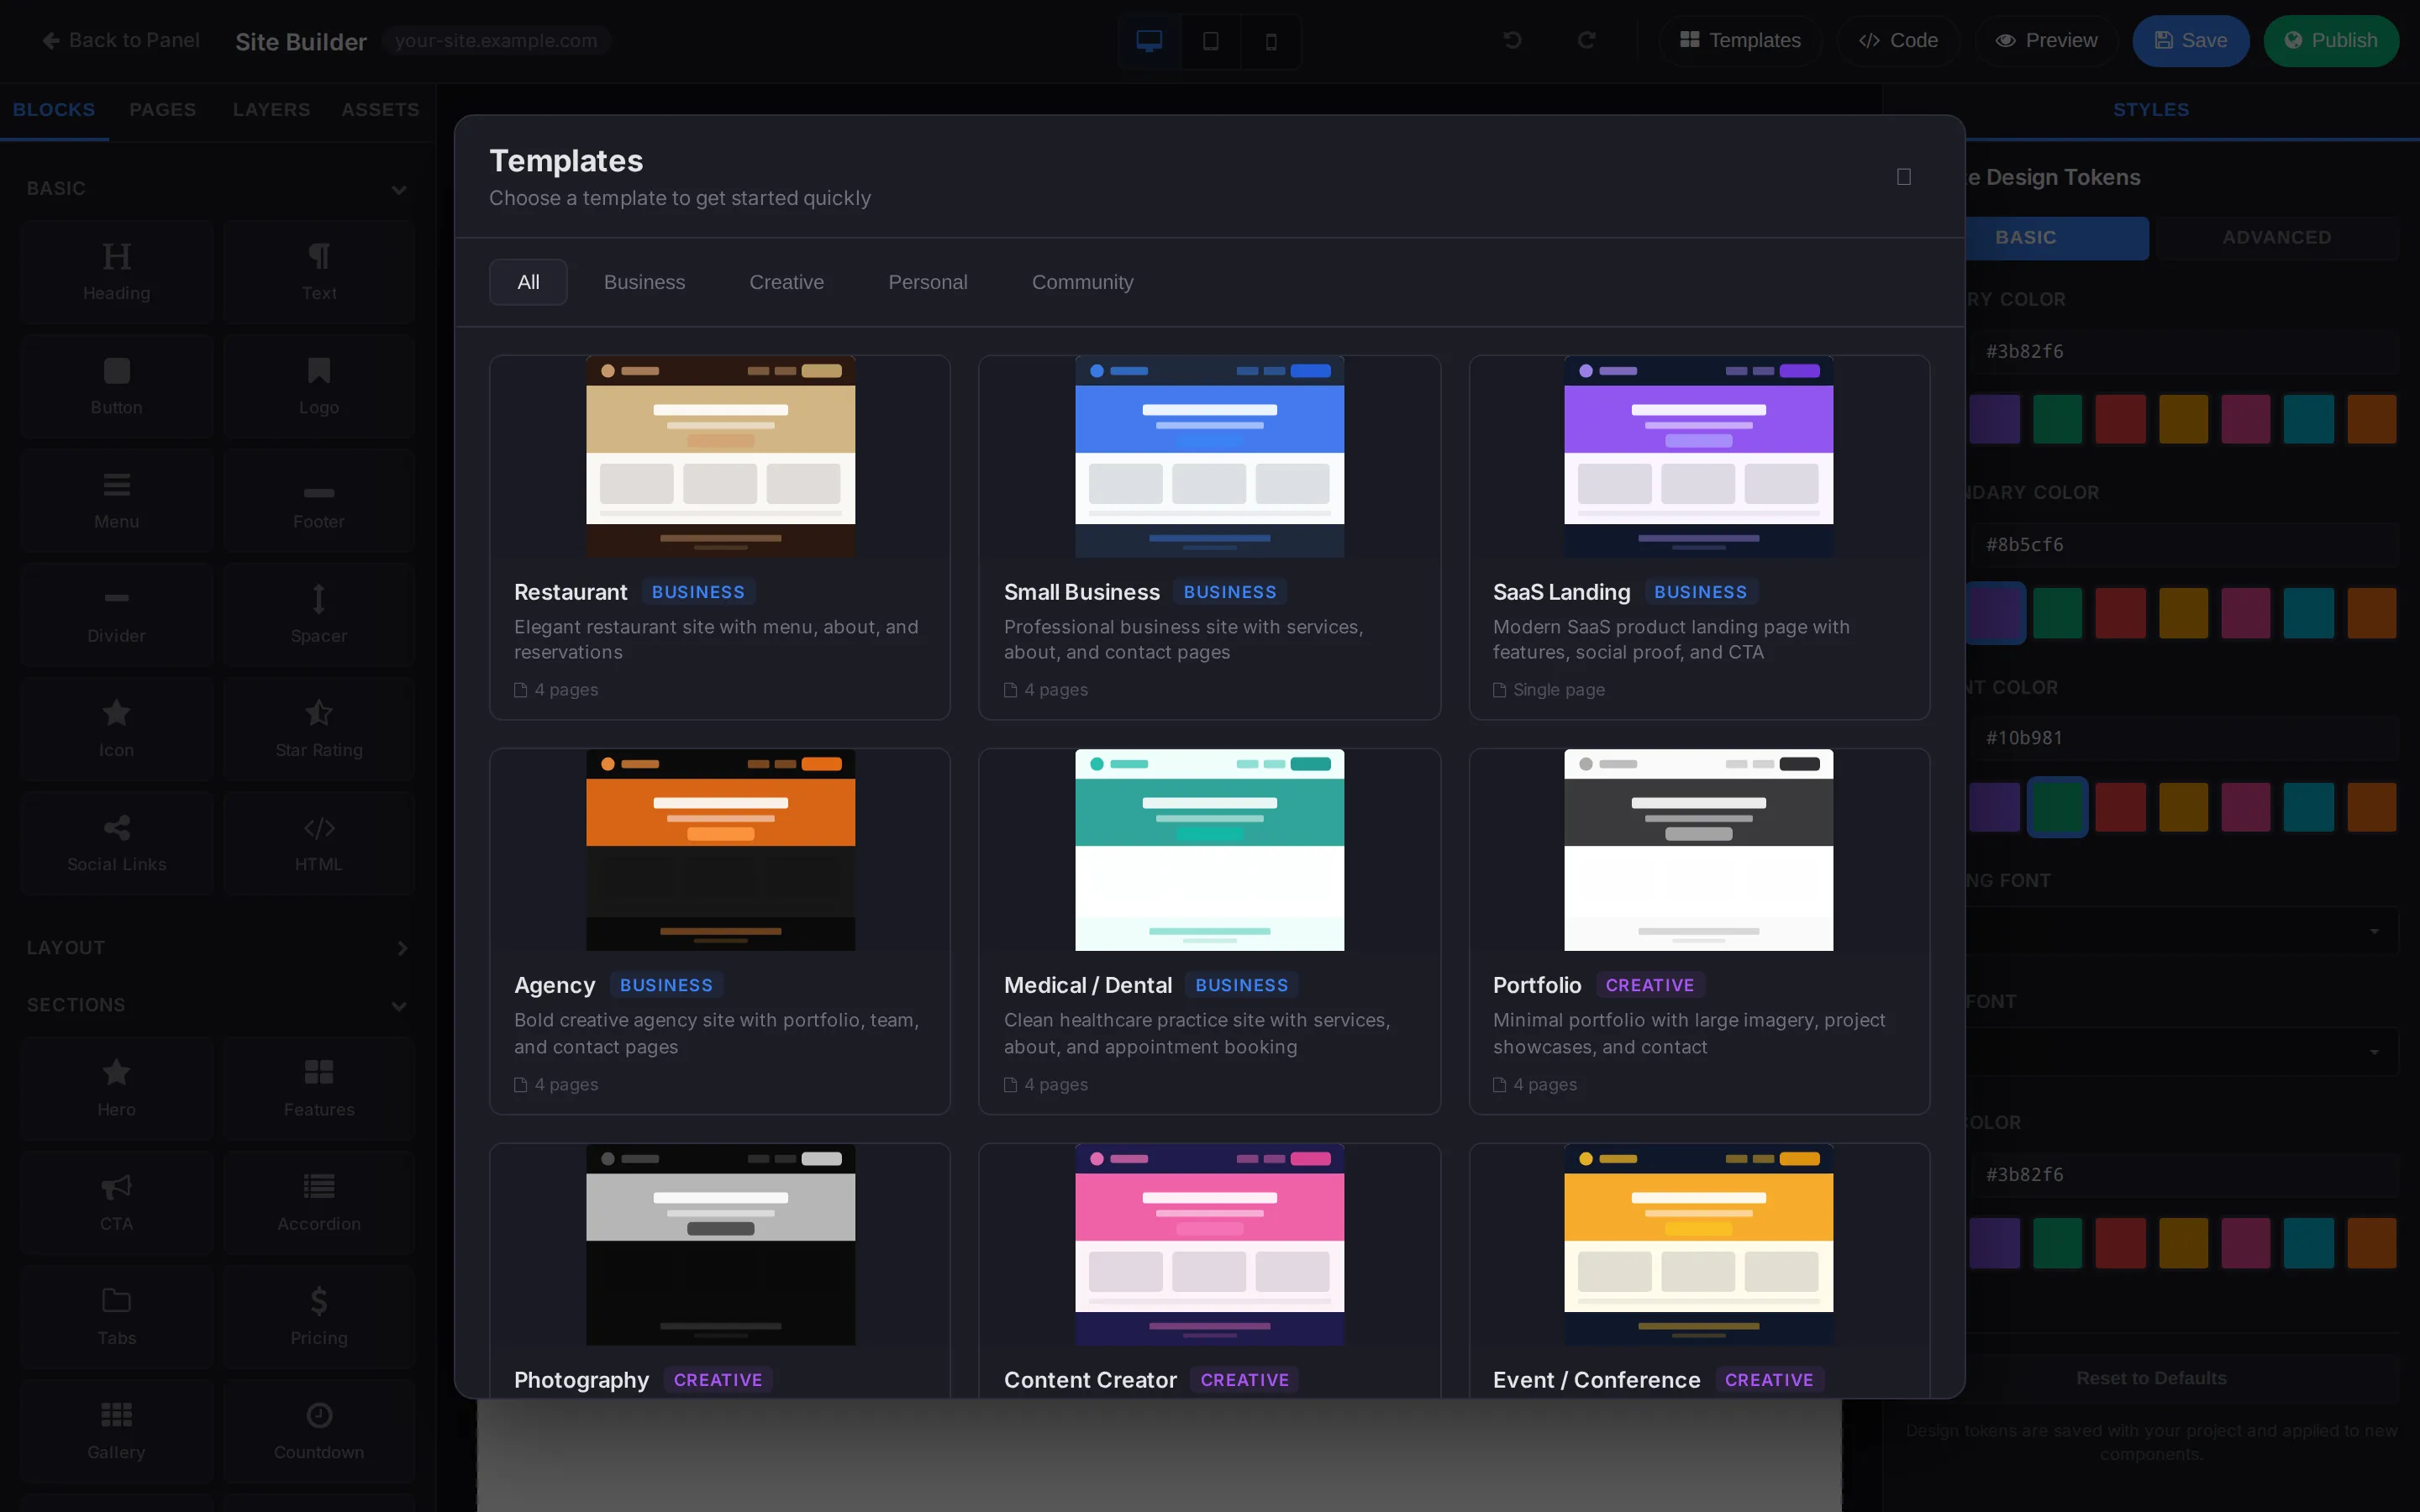
Section titled “Pick a template (or start blank)”The editor opens onto an empty canvas, but the fastest way to get a real-looking site is to start from one of the 16 included templates.
-
Click Templates in the top bar.
-
Browse the categories: Business, Creative, Personal, Community, or All. Each card shows the template name, a tag (Business / Creative / etc.), a short description, and the page count.
-
Click a template to preview and apply. Most templates ship as multi-page sites with their own header, footer, and a few sample pages so you can see structure right away.
If you’d rather start from scratch, skip Templates — the empty canvas with just a Header placeholder is the right starting point.
Make your first edit
Section titled “Make your first edit”The editor has three panels:
- Left: the Blocks panel (also Pages, Layers, Assets).
- Centre: the canvas — what your visitors will see.
- Right: the Styles panel.
-
From the Blocks panel, drag a Heading block onto the canvas.
-
Click the heading on the canvas. An inline toolbar appears; type to replace the text.
-
Drag a Text block underneath and add a sentence or two.
-
Drag a Button block next. Click it, set its label and link in the right-side panel.
You’ve built your first page. The header at the top is the shared header — every page on the site uses it.
Preview the result
Section titled “Preview the result”The top bar has three device toggles next to the site name: desktop, tablet, mobile. Click each to see how your page looks at that width. The Preview button opens a full-window preview without the editor chrome.
Save vs. publish
Section titled “Save vs. publish”Two distinct actions:
- Save stores a draft. Your changes are kept on the server but the live site is unchanged.
- Publish writes the rendered HTML and assets to the site’s docroot. Your visitors see the new version on the next request.
Get back to the Site Builder list
Section titled “Get back to the Site Builder list”Click Back to Panel in the top-left of the editor. You can come back any time and continue from where you left off.
What’s next
Section titled “What’s next”- Blocks & pages — the rest of the block library, and how to add more pages.
- Styling your site — set your colours and fonts in one place.
- Publishing & code injection — add analytics, custom fonts, or global CSS.
Still stuck?
Section titled “Still stuck?”Still stuck? Open a support ticket and our team will help.